
Moving a member list across is the job that makes or breaks a migration — so Repstra keeps the format deliberately tiny. Two columns, one upload, and your roster is in.
- 1
Export a name and email list
From your current system (or a spreadsheet), export a CSV with two columns: name and email. The email is optional per row, and it's fine to keep a header row — Repstra skips it automatically.
- 2
Open the Clients tab
In your studio dashboard, go to Clients. At the top is the Add clients card with two tabs — switch from Single to Bulk CSV.
- 3
Choose your file
Pick your CSV with the file picker. Repstra parses it on the spot and confirms with a count — e.g. 142 rows parsed — before anything is imported.
- 4
Assign a trainer (optional)
A dropdown appears — Assign all to: Unassigned (owner) by default. Pick a trainer to give every imported member a coach straight away, or leave them unassigned and sort it per-member later from the roster.
- 5
Import
Tick Send invites to all if you want every member emailed an app invite immediately (you can also invite later), then click Import. When it finishes you get a plain summary: how many were imported, skipped and failed.
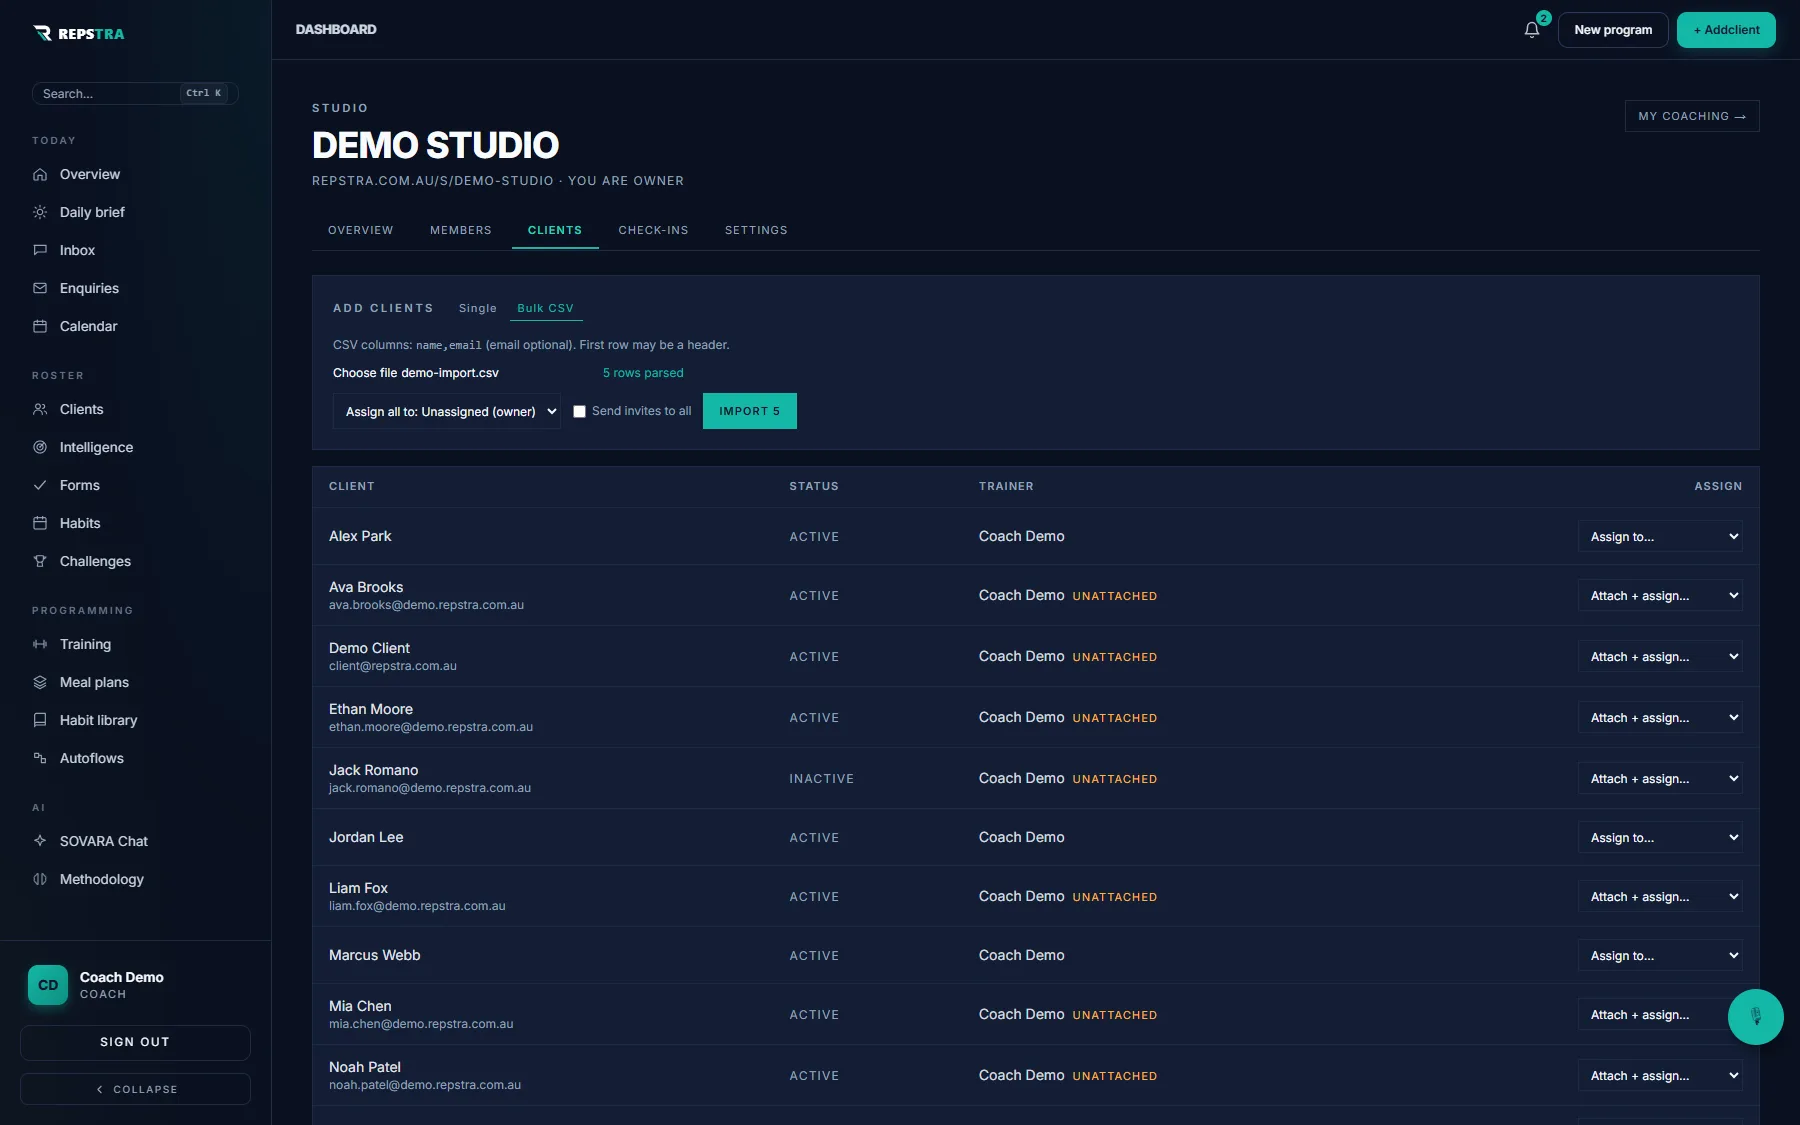
Bulk CSV on the Clients tab — rows parsed, trainer assignment, roster below.
Imported members show up in the roster below the import card, tagged by how they arrived — so you can always tell a CSV import from a kiosk walk-in. From here, the next move that actually changes retention is giving one of them a coach.